A step by step guide to developing Visual Studio item templates using SideWaffle
At the moment, endjin are working hard on a new Azure based content management system. It is an exciting and modern solution that is rapidly approaching an alpha release. A large part of how this product works is through the use of plugins. As part of creating an excellent developer experience, we wanted to create a set of templates that can be used to unfurl different types of base plugin into a Visual Studio solution.
It is possible to use a VSIX Project and the TemplateBuilder nuget package to create a Visual Studio extension, which when installed makes a set of item templates available in the "Add New Item" menu in Visual Studio.
The following steps will guide you through that process:
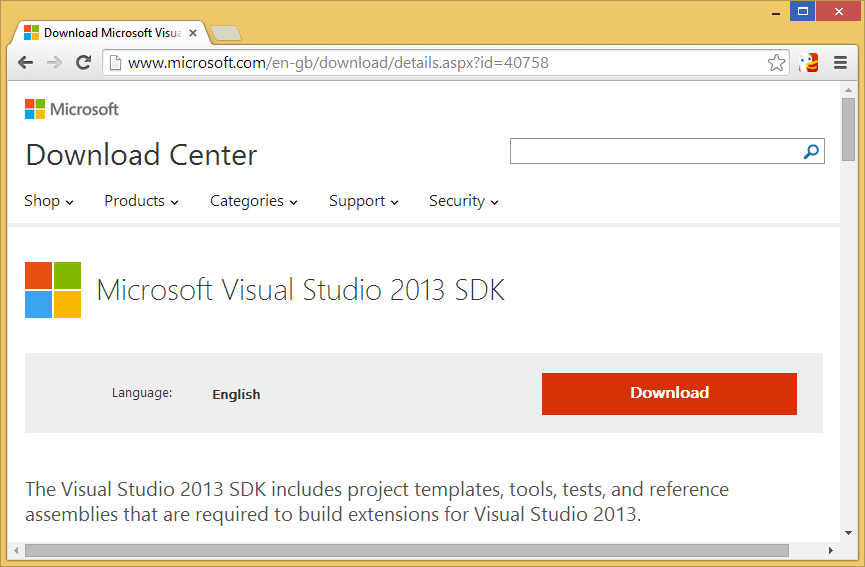
Download and install the Visual Studio 2013 SDK. Among other things, this will make the VSIX project template available to you. The VSIX project template is also available if you are using 2012 or 2010.
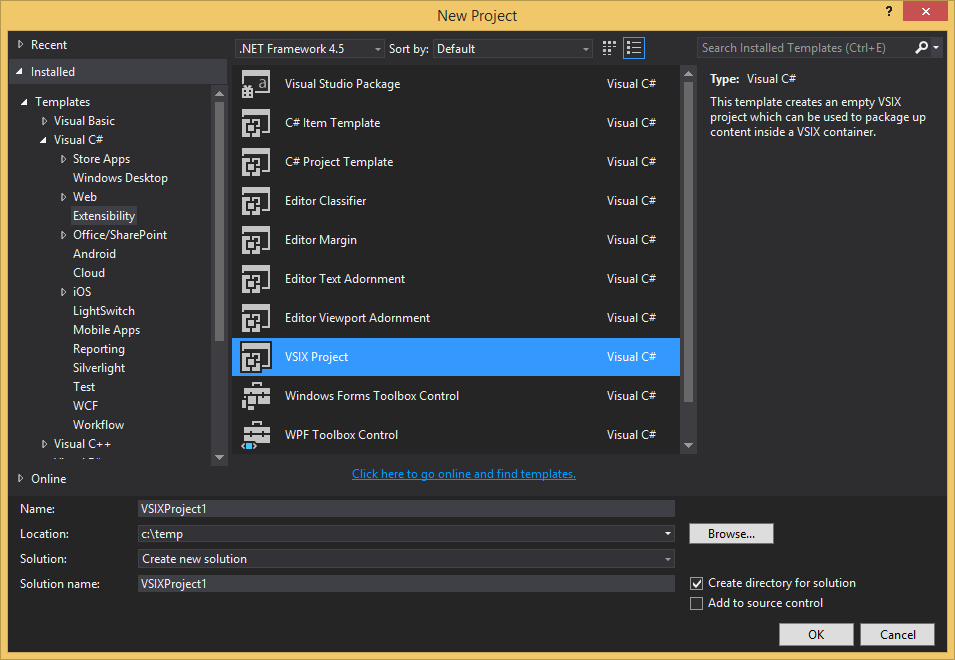
In Visual Studio, create a new VSIX Project. You'll find it under the "Extensibility" section of the New Project dialogue.
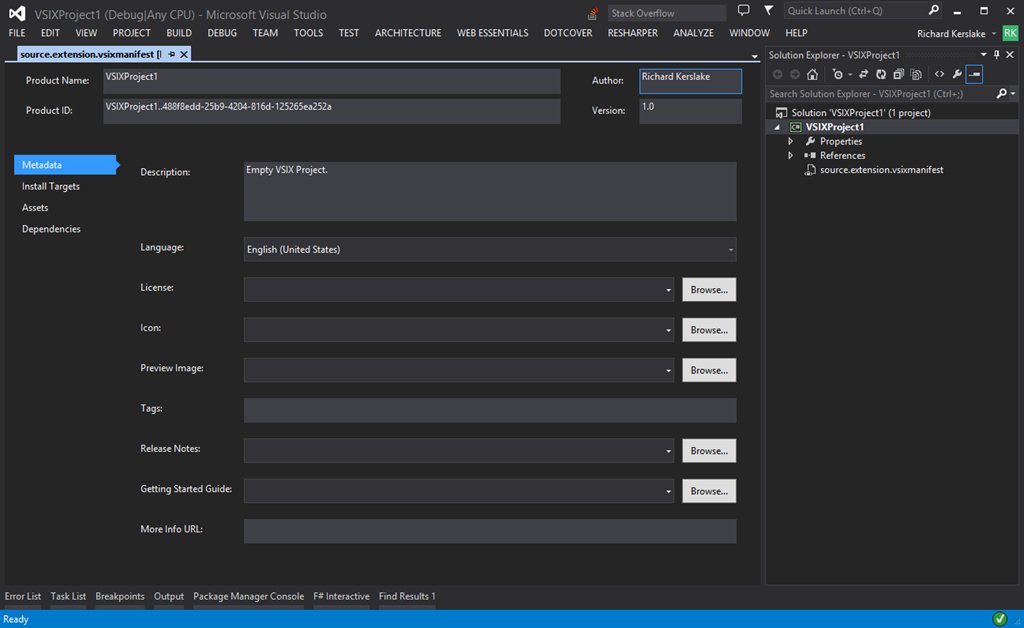
Once the new project has been created, you'll see the vsixmanifest file with some initial data populated. You can change the prepopulated values to whatever you like, but you will also need to fill in the Author field.
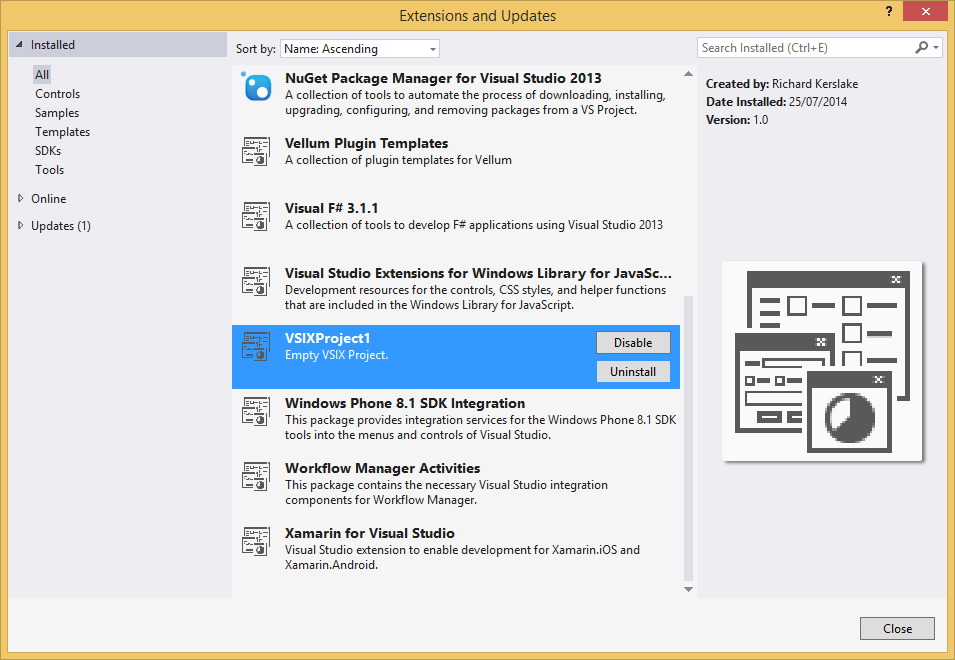
After the VSIX extension has been installed, you will be able to see it listed in the "Extensions and Updates" window. The Product Name, Description, Author and Version fields will be visible.
Install the TemplateBuilder package, using the Package Manager Console window (assuming you have nuget installed!), by running the following command:
Install-Package TemplateBuilder –Pre
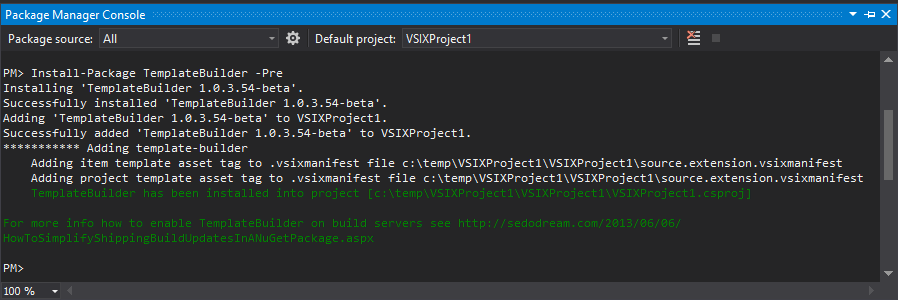
The TemplateBuilder package updates the build process to automatically build templates from the contents of an ItemTemplates folder. The package readme says it has created that folder and added a demo template, however I didn't see this. If it doesn't exist, add a new folder called ItemTemplates to the project.
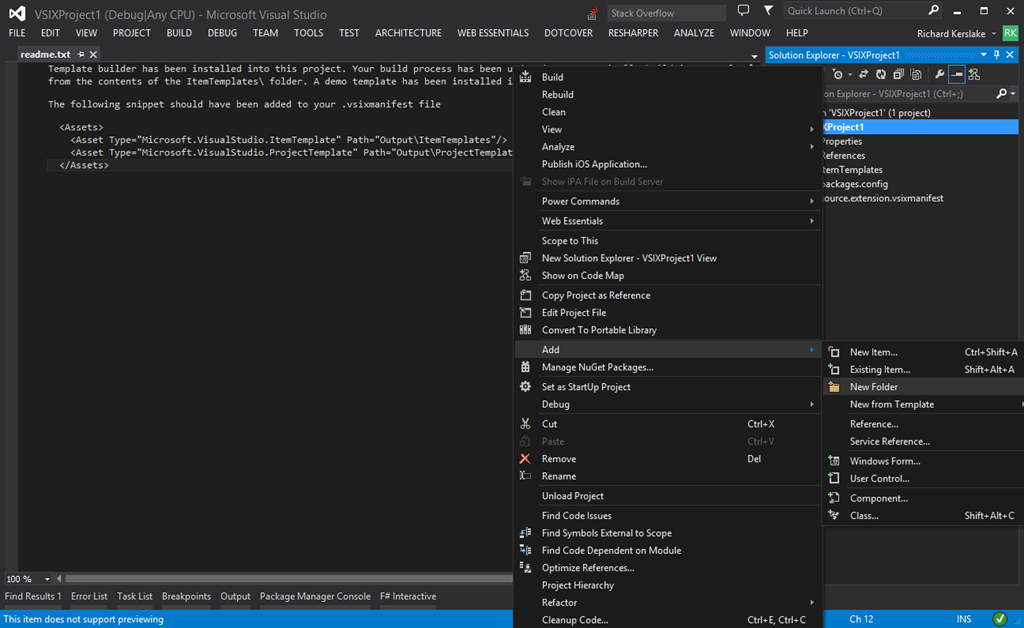
Add another folder under the ItemTemplates folder. The name of this folder is the category your templates will appear under in the "Add New Item" window.
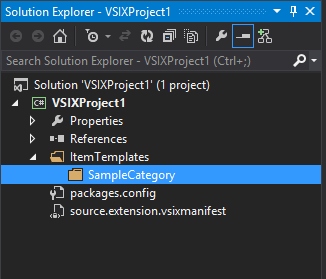
At this point, we could manually create some files to set up our template. However, I'd suggest installing the SideWaffle template pack. This extension adds a whole selection of project and item templates to your Visual Studio. It also adds templates to aid you in creating more templates! (At this point I start hearing "We need to go deeper!" in a Leonardo Di Caprio voice…)
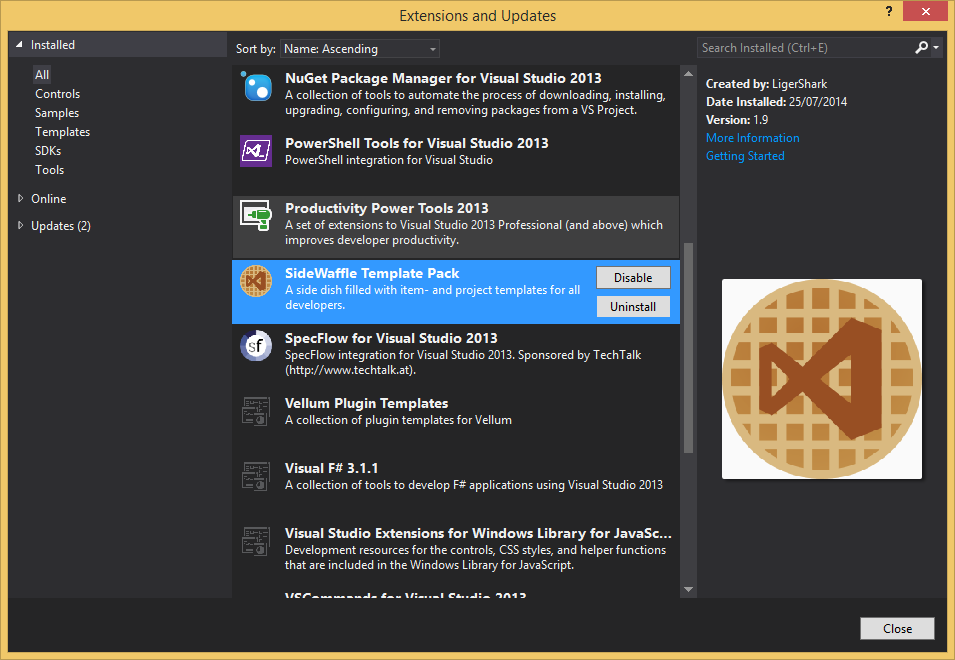
Once SideWaffle is installed, you can see it in the "Extensions and Updates" window:
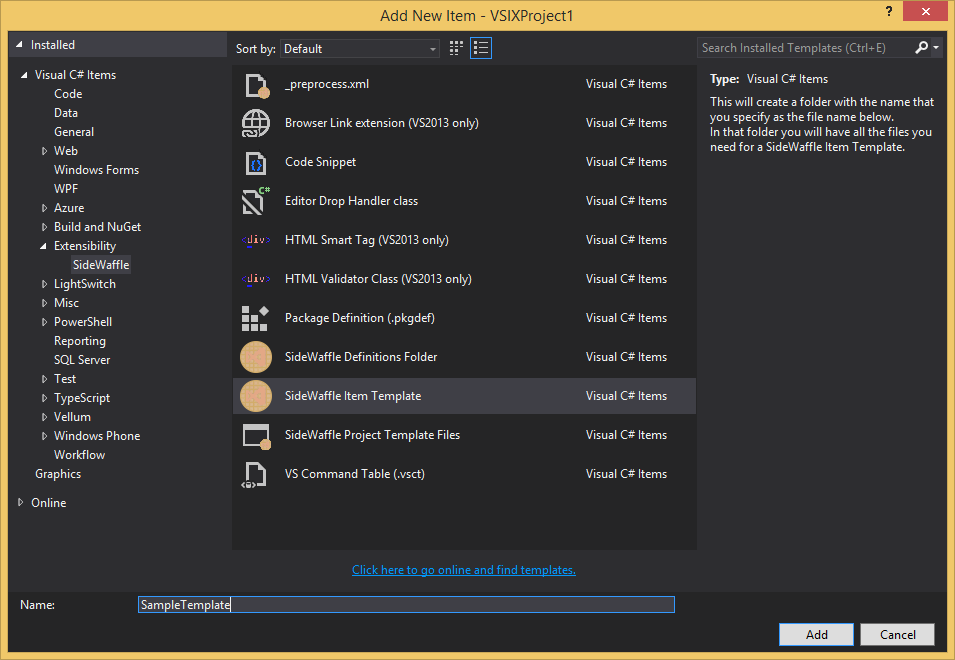
Add a new item to the "SampleCategory" folder (Ctrl-Shift-A or right click, Add, New Item).
In the "Add New Item" window, search for "sidewaffle", or pick the Extensibility category. You'll see a "SideWaffle Item Template". Select it, change the name to whatever you want your new template to be called, and hit Add.
This creates a new folder with the name you provided, with a number of .vstemplate files, an icon image and a readme.
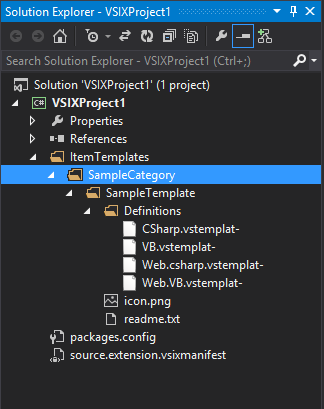
I'm not interested in making my template available for VB projects. I am fine with the template being available for both C# and C# Web projects. So I'll delete the two VB vstemplate files, and rename the remaining two from .vstemplat- to .vstemplate. I'll assume you are doing the same. Delete the readme.txt file as well.
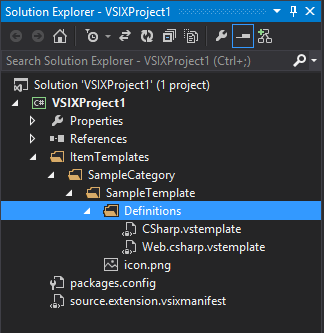
Now we need to add the folder structure and files that will compose our template. For this sample let's assume we want two folders. One will contain a couple of C# classes. The other will contain some HTML, that I want as an Embedded Resource. Let's add that structure under the SampleTemplate folder:
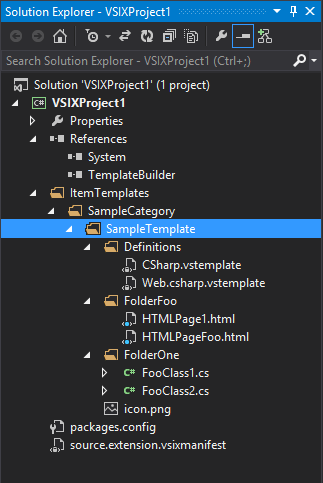
There are a couple of tasks we need to achieve as part of turning this into a useful template:
In various folder names, file names and file contents, we have the word "Foo". This needs to be a parameter that can be updated across the entire template.
Normally to make a file an embedded resource you would go to it's properties and changed the Build Action to "Embedded Resource". However that won't work in this case. Normally that would affect the current project – we actually need to change the build action in whatever project we happen to unfurl our template into. We'll see how to achieve this shortly.
To achieve these final pieces of the puzzle, we need to update the vstemplate files to accurately reflect our folder structure, the fact that we have multiple files, and the fact we have a name that needs replacing across multiple files. Initialy the CSharp.vstemplate looks like this:
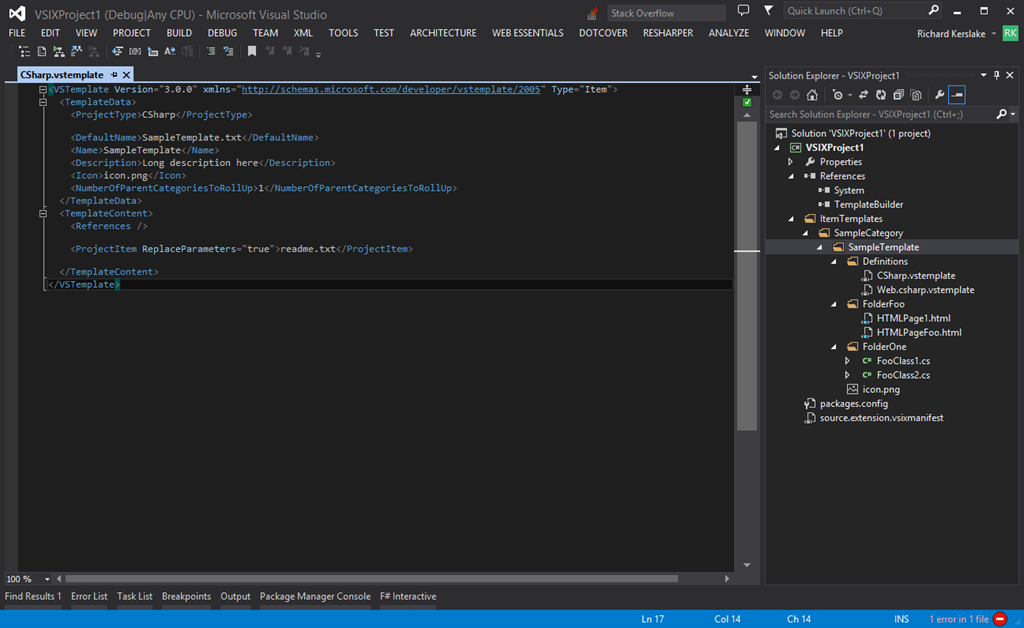
We need to add a "ProjectItem" node for each file in the template, we need to ensure the file paths are correct, and we need to add the necessary parameterisation and item types (to set the file build action). Once completed for our sample project, it looks like this:
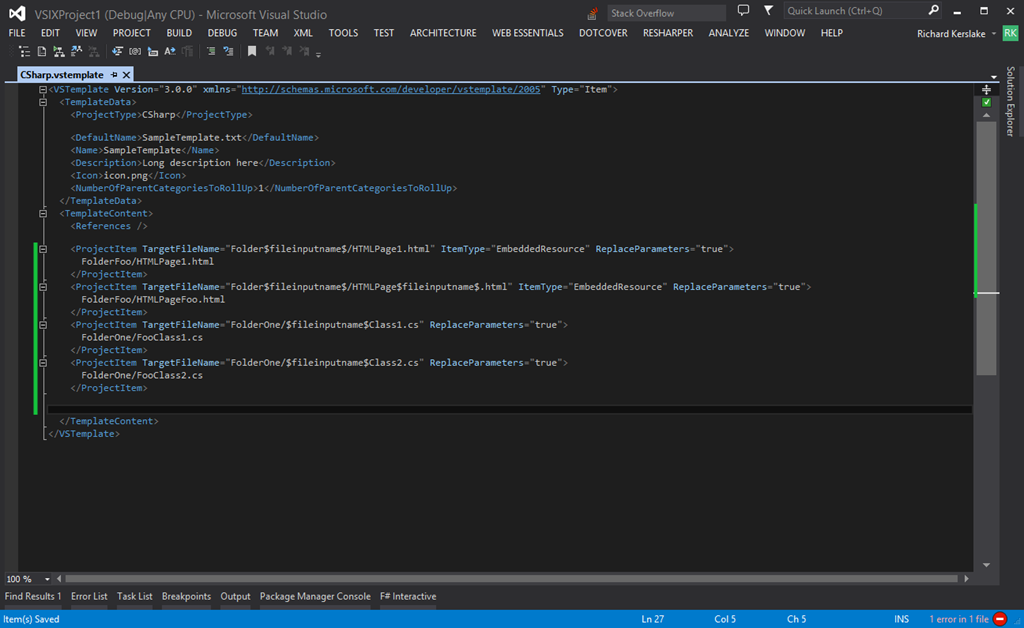
Note the token "\(fileinputname\)" has replaced "Foo" in the TargetFileName attributes, in both the folder and file names.
The same token is used a couple of files in the template as well:
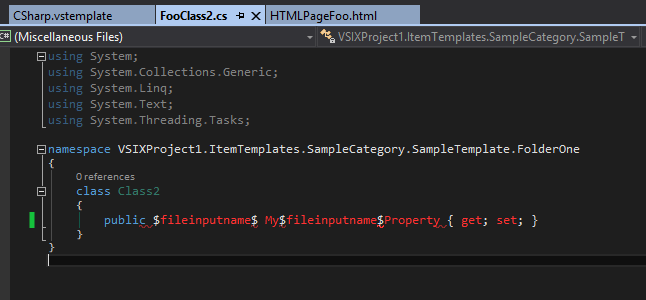
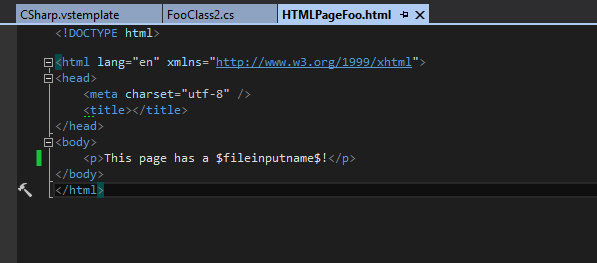
There are a number of built-in parameters that you can use. See the template schema reference and template parameters reference for more details. It is also possible to use custom parameters and a custom wizard, which I could go into in more detail in the future.
We've now completed everything for the VSIX project, so let's build it. This generates a vsix extension installer in the build output folder:

Run the VSIX project by hitting Ctrl-F5. (Ctrl means it will run without the debugger attached, which will be quicker as it doesn't have to load all of the assemblies that would be necessary for debugging.)
This launches an Experimental Instance of Visual Studio. You'll see it says "Experimental Instance" in the title bar. The Visual Studio SDK provides an alternative instance of Visual Studio that you can use to experiment. By creating a VSIX project, we are creating something that can alter Visual Studio itself, so it is a good thing to be able to run it in an isolated instance. You could test the VSIX manually by installing it, but then you'd have to restart Visual Studio, or start a new one, and remember to uninstall the extension at a later date, or every time you wanted to test a new build.
In the Experimental Instance, verify that the VSIX extension is installed by going to the Tools menu, and opening the Extensions and Updates window. Look for your extension:
In the Experimental Instance, create a new Console Application.
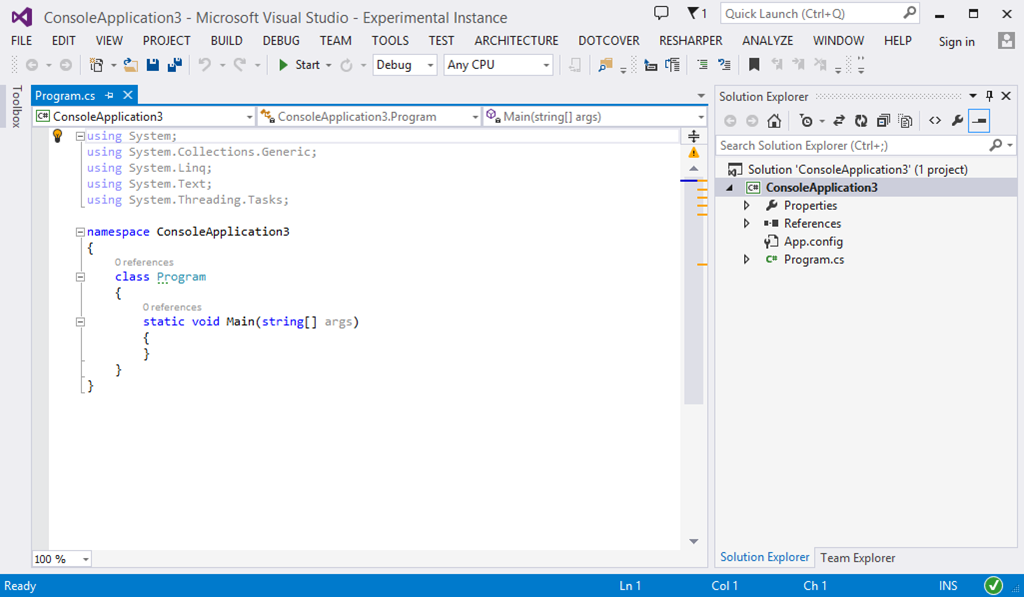
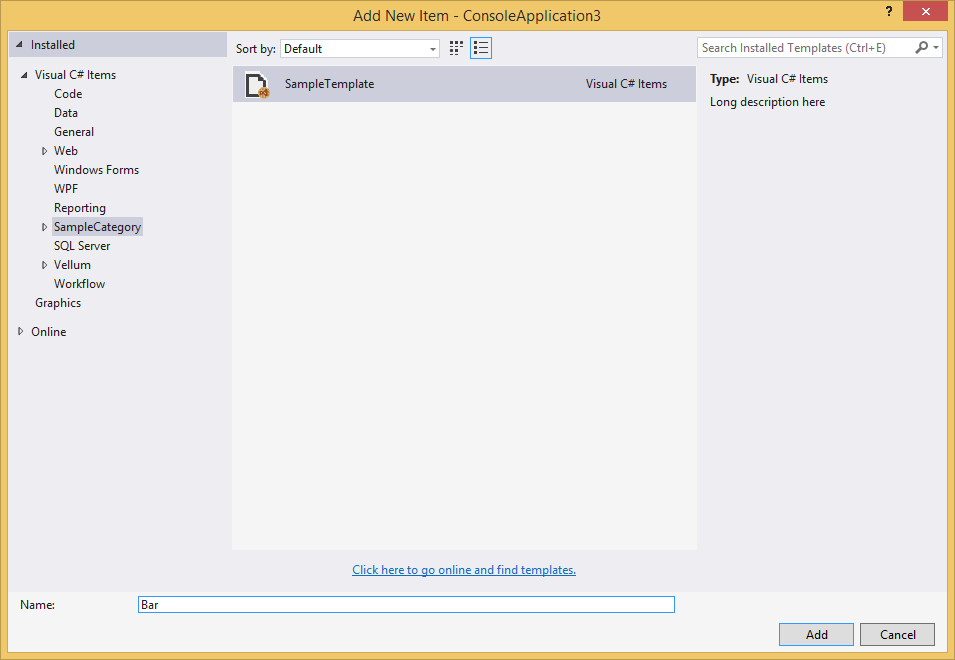
Right-click on the project in Solution Explorer, and click Add, New Item (or hit Ctrl-Shift-A). In the Add New Item window, you'll see the "SampleCategory" section on the left hand side, which contains one template called "SampleTemplate". So far so good!
Give the template a name. This name will be used to replace all the parameters we created earlier.
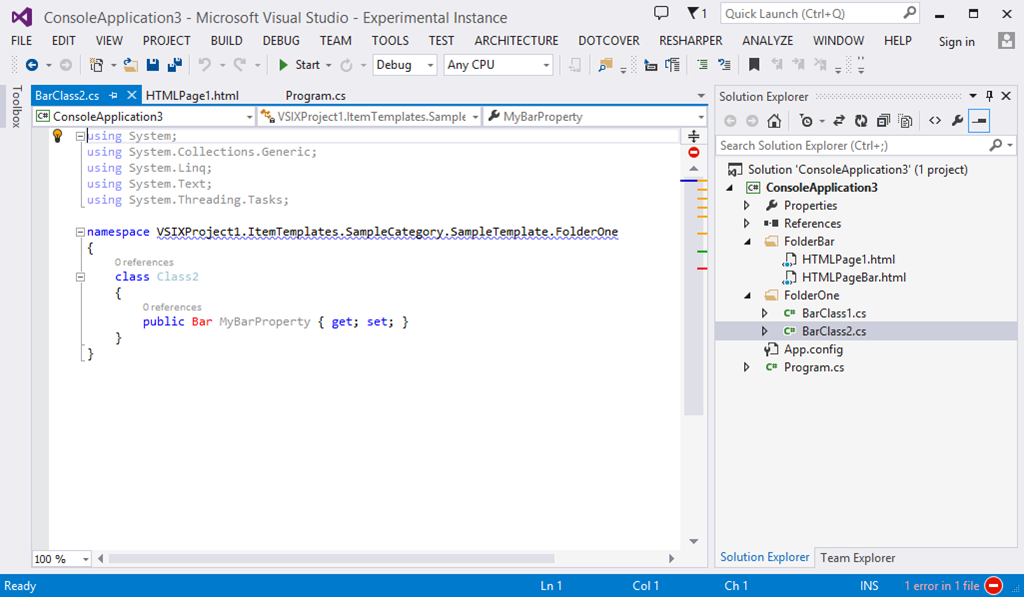
Click Add and all of our template folders and files are unfurled into our Console Application, including replacement of the token in the folder names, file names and file contents.
You could add many more templates to the same VSIX project, to create a library of template types specific to your purposes. To deliver this template package to other people, just hand out the vsix, host it somewhere yourself, or upload it to the Visual Studio extension gallery.
Simple, yet awesome!

